Previously, I split an image into a bunch of rectangles. What about using triangles? This requires more thought, as it’s a little trickier to divide up the plane using triangles. The natural solution is to keep track of a set of vertices, then use a Delaunay triangulation to split up the image.
First, let’s do constant-color triangles. How do we pick where to put the new points? Let’s define the error as the absolute difference between the original image and the approximation. Since we know that a vertex is where the image is broken up, a good guess is to put a vertex at a low-error point. This isn’t quite obvious, but because the current estimate is the average over a region, the lowest error points will be where the average level is crossed. This ends up splitting the image along edges! Check it out:

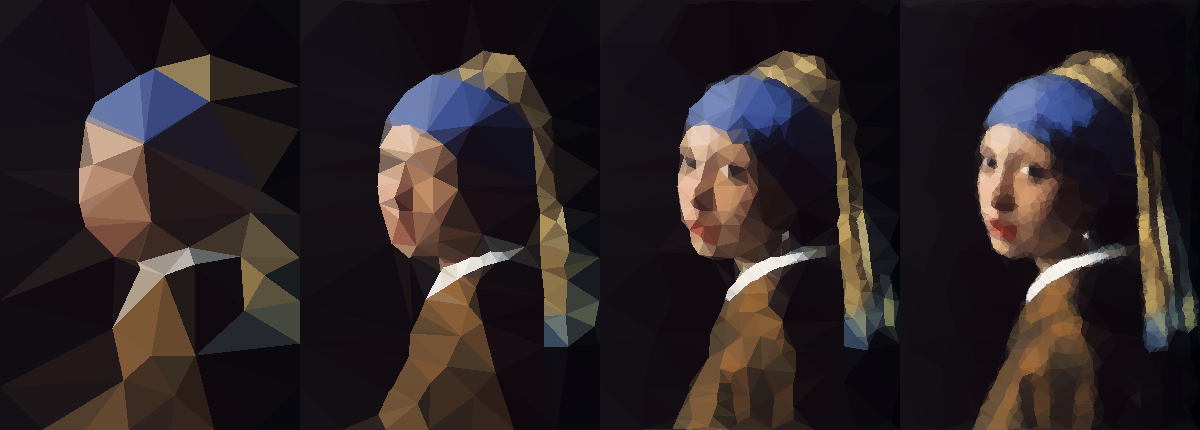
Here’s a comparison of four different error cutoffs, with the error decreasing by 5x as you move across. As expected, smaller allowable error results in smaller triangles.

What about using gradients inside the triangles? Edges become a problem, because small triangles are needed to span an edge to properly render it. The best method that I found was to put a new vertex at the highest-error point in the triangle.

Here’s the same sort of refinement for the gradient rendering. Once the triangles get tiny, it looks better than the uniform triangles. Larger than that, the gradients look unnaturally spikey.

Of course, there are lots of possible knobs to tweak. One complication is that when you add an extra point inside a triangle, that may change the triangulation and create a few extra triangles, each with new error levels. That means that if you add too many new points per iteration, there may be a lot of extra triangles. So what’s the optimal number of points to add?
It depends what you want. More points per iteration means that you converge in fewer iterations, but at the cost of extra triangles. If you add 100% of the new points vs 10%, you have about 15% more triangles at the end. So for a simpler output, refine slowly.
2 replies on “Image Triangulation”
You could add a optimizer like this
https://codepen.io/hex2bin/pen/ExjEPvK
Nice! That really does improve over time.
A combination of the two would probably work well: start with points on edges, then refine with that random search.